How to Sign a Word Document
A digital signature is a specific type of electronic signature, based on digital certificates.
These certificates are issued by public certification authorities such as Entrust, after an identity verification process. They are typically stored on special USB tokens, designed to host certificates and digital signing keys securely.
Microsoft Word provides the ability to add digital signatures, from one or more individuals to provide:
- Signature accountability
- Content authenticity
- Document integrity
This example explains how to sign a Word document using an Entrust digital certificate called Document Signing Certificate.
Option 1: Digitally sign without any visual signature line on a Word document
Step 1:
Get a Document Signing Certificate from Entrust. Document Signing Certificates are valid from 1 to 3 years, and are issued in a USB token that we ship to you after we verify your identity. This process can include a live video session.
Step 2:
Install your Document Signing Certificate. You can follow this tutorial.
Step 3:
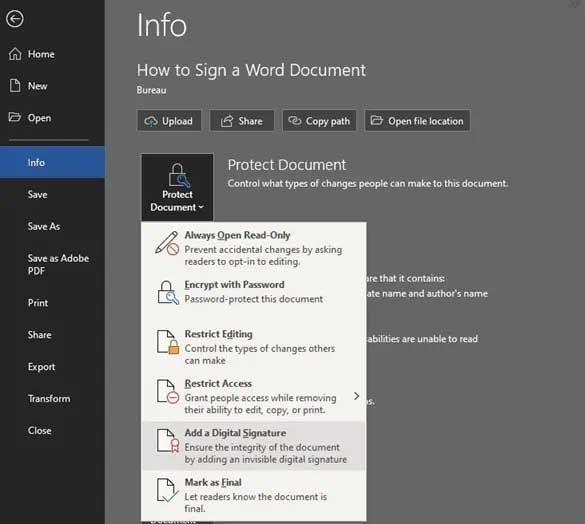
Open the Word document to digitally sign and select the File tab.
- Be sure that Info is selected in the left menu.
- Select Protect Document > Add a Digital Signature.
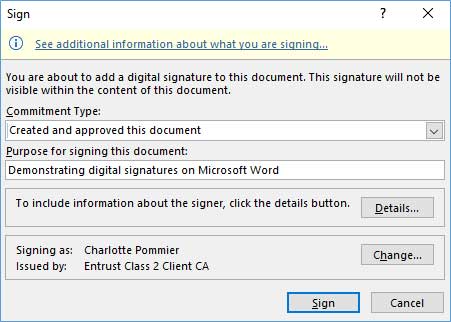
- In the Sign dialog:
- Select the Commitment Type (creator, approver, or creator and approver).
- Enter a purpose for signing the document.
- Click Details to enter information about who you are (title and location). This information will become part of your signature.
- Click Change to select your Entrust Document Signing Certificate, if it does not appear in the bottom panel.
- Click Sign.
- Provide your token password, if requested.
- If the Request Permission to use a Key dialog appears, select Grant permission to continue.
- Word proceeds with signing the document.
Option 2: Digitally sign with a visual signature line on a Word document
Step 1:
Get a Document Signing Certificate from Entrust. Document Signing Certificates are valid from 1 to 3 years, and are issued in a USB token that we ship to you after we verify your identity. This process can include a live video session.
Step 2:
Install your Document Signing Certificate. You can follow this tutorial.
Step 3:
Open the Word document to digitally sign and select the Insert tab.
- In the Signature Line section, select Microsoft Office Signature Line.

- Fill in the optional fields for the signer, and click OK. The signature field will be displayed in your document and can be moved.
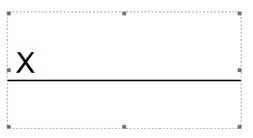
- You can now send the document to the signer, or sign yourself if you are the signer. Simply double-click the signature line, and either enter your first and last name or - if you have one - add a picture of your signature by clicking on Select Image.
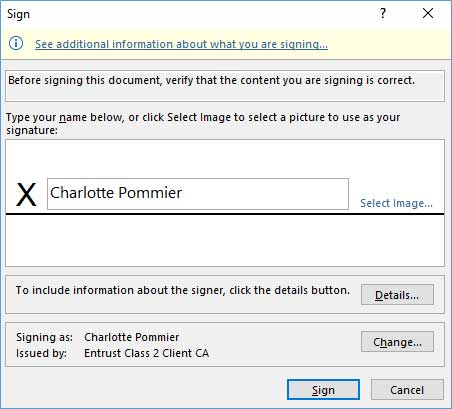
- Make sure your document signing certificate is selected in the Signing as field. You can click Change to select the correct certificate if needed. Then click Sign.
- Provide your token password, if requested.
- If the Request Permission to use a Key dialog appears, select Grant permission to continue.
- Word proceeds with signing the document.
Examples
A digitally signed document will display banners indicating that the document is marked as final, cannot be edited, and contains signatures.

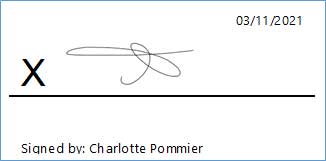
If the signature was generated from a signature line, it will also be displayed inside the document where the signature line was placed:
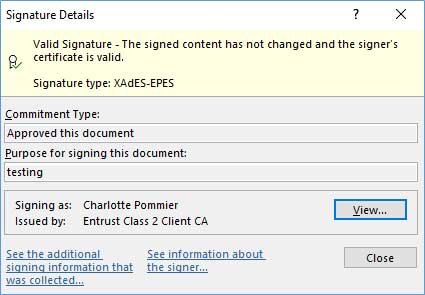
Digital signatures can be examined by clicking on View Signatures. The verified name of the signer and the reason for signing are displayed.
