SSL/TLS Certificate Installation Instructions - Microsoft ISA

Purpose:
SSL/TLS Certificate Installation Guide
For Microsoft ISA
Need Certificate Signing Request (CSR) help? Please see our technote on how to generate a CSR in Microsoft ISA
here
.
The installation is in three parts:
1) Export the Server Certificate to a PFX file
2) Import the Server Certificate onto the ISA server
3) Enable SSL/TLS on your ISA server
Part 1 of 3:
Export the Server Certificate to a PFX file
1. Click
Start
, and then click
Run
.
2. Type in mmc and click OK .
3. From the File menu, choose Add/Remove Snap-in .
4. In the new window that appears, click Add .
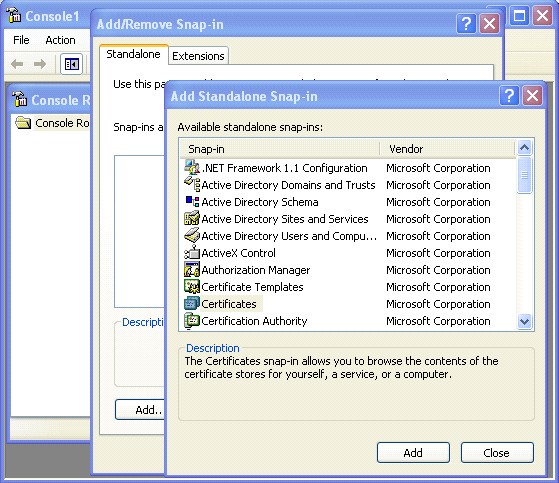
5. Select
Certificates
and then click
Add
.
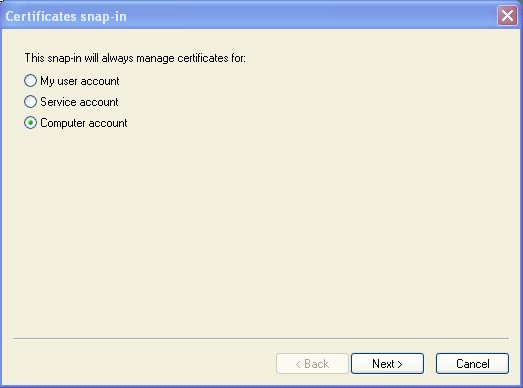
6. Choose the
Computer account
option and click
Next
.
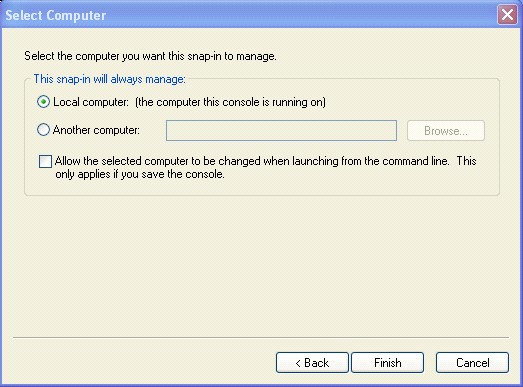
7. Select
Local Computer
and then click
Finish
.
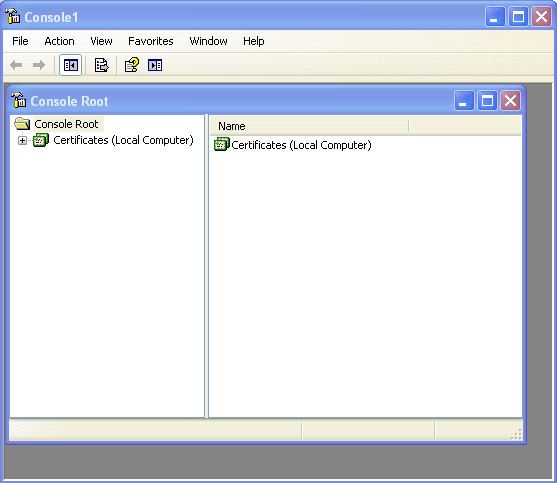
8. Click
Close
, and then click
OK
. You should see the snap-in for
Certificates (Local Computer)
in the console.
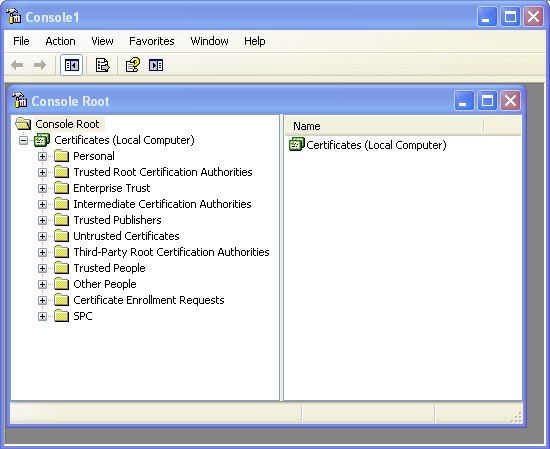
9. Expand the
Certificates (Local Computer)
tree in the left preview panel.
10. Expand the
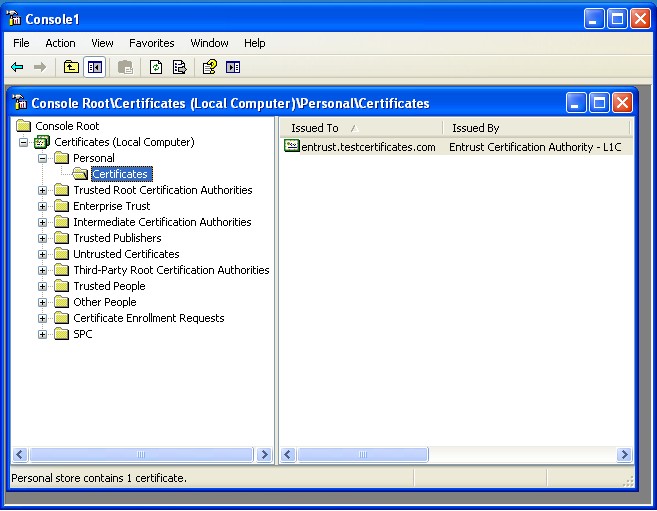
Personal
folder in the left preview panel and click on the
Certificates
folder.
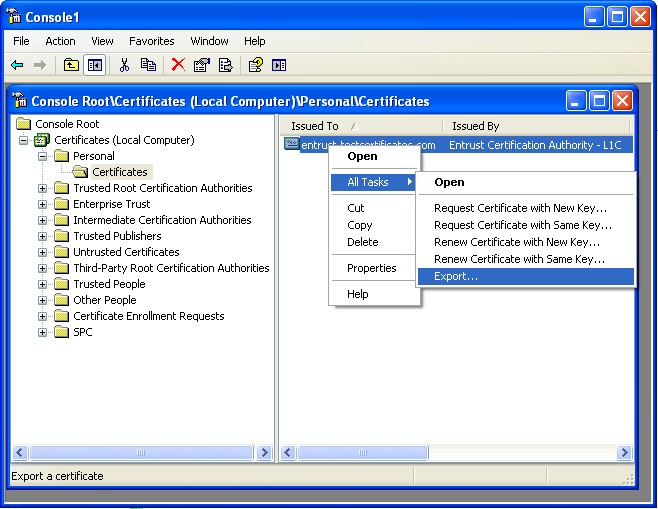
11. Right-click on the certificate you wish to backup. Select
All Tasks > Export
.
12. The Certificate Import Wizard appears. Click Next .
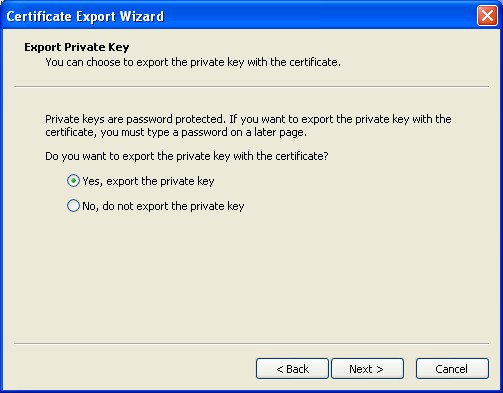
13. Select
Yes, export the private key
and click
Next
.
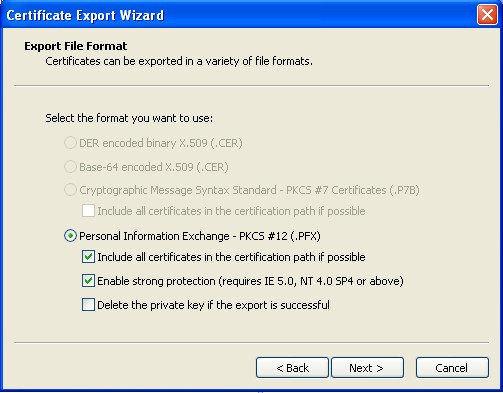
14. Select
Personal Information Exchange
as the format you want to use. Check the box to
Include all certificates in the certification path
.
Do not check the box to
Delete the private key
. Click
Next
.
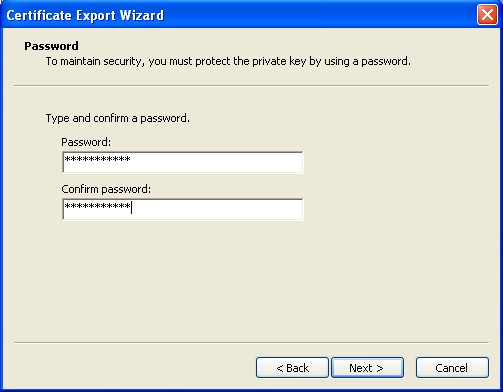
15. Enter a password for the private key and confirm.
Remember this password as you will need it to import the certificate
. Click
Next
.
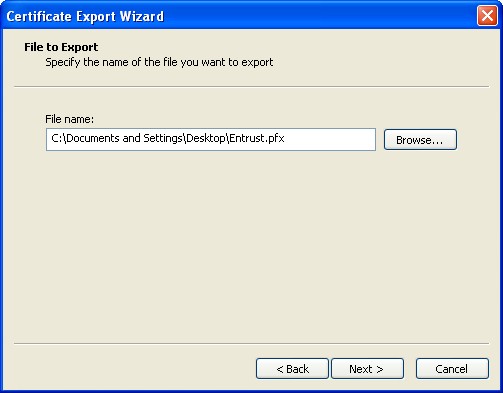
16. Supply a file name to save your PFX file and click
Next
.
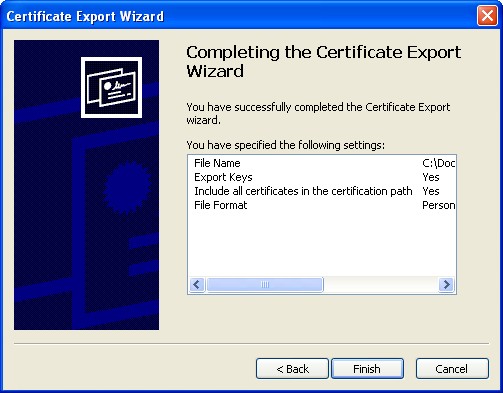
17. Click
Finish
to complete the Certificate Export Wizard.
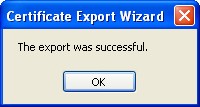
18. You should see a dialog box indicating the export was successful. Click
OK
.
Part 2 of 3: Import the Server Certificate onto the ISA server
A certificate and private key saved in PKCS #12 (.PFX) format can be imported to a Microsoft web server by following the steps below:
1. Click Start , and then click Run .
2. Type in mmc and click OK.
3. From the File menu, choose Add/Remove Snap-in .
4. In the new window that appears, click Add .
5. Select
Certificates
and then click
Add
.

6. Choose the
Computer account
option and click
Next
.

7. Select
Local Computer
and then click
Finish
.

8. Click
Close
, and then click
OK
. You should see the snap-in for
Certificates (Local Computer)
in the console.

9. Expand the
Certificates (Local Computer)
tree in the left preview panel.

10. Expand the
Personal
folder in the left preview panel and click on the
Certificates
folder.

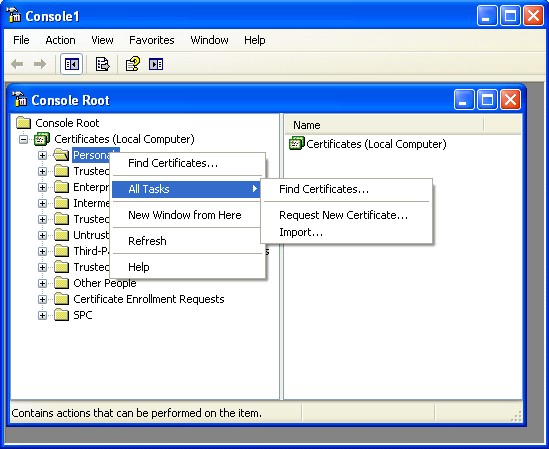
11. Right-click the
Personal
folder and select
All Tasks > Import
.
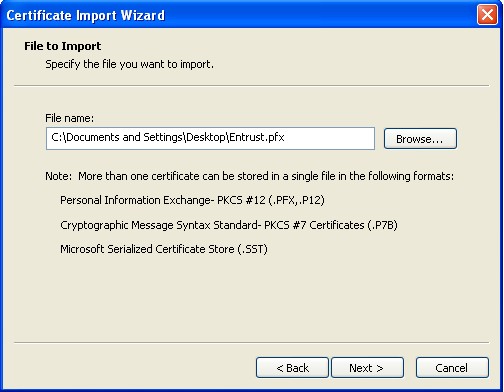
12. The Certificate Import Wizard appears. Click Next .
13. Browse to the location of your PFX file and click
Next
.
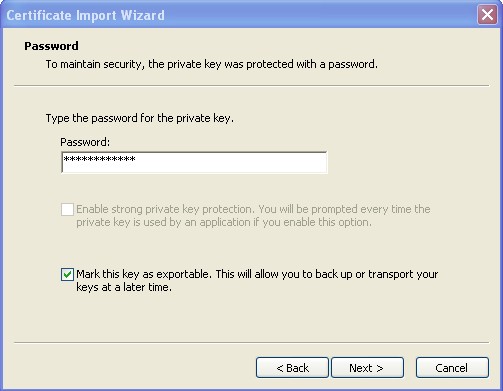
14. Enter the password for the private key. Select
Mark this key as exportable
and click
Next
.
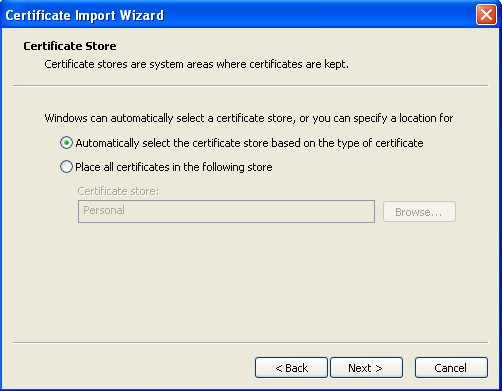
15. Select
Automatically select the certificate store based on the type of certificate
and click
Next
.
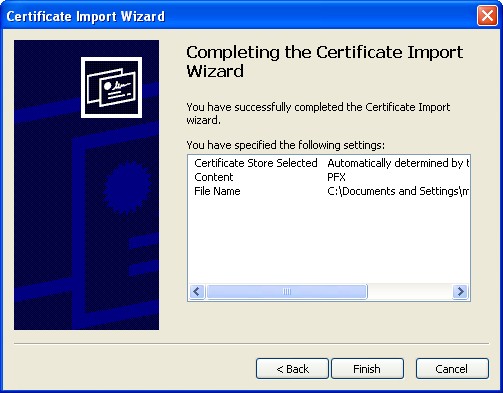
16. Click
Finish
to complete the Certificate Import Wizard.
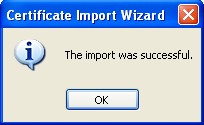
17. You should see a dialog box indicating the import was successful. Click
OK
.
Part 3 of 3: Enable SSL/TLS on your ISA Server
1. Open your ISA Server Management application and select Firewall Policy .
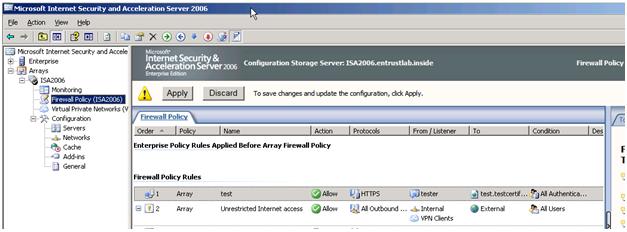
2. Right click on the firewall policy for the site in question and select properties.

3. Select the Listener tab.
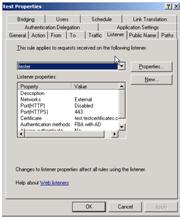
4. Click
Properties
and select the
Certificates
tab.
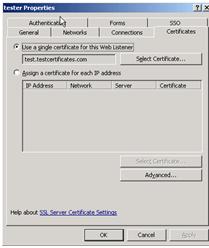
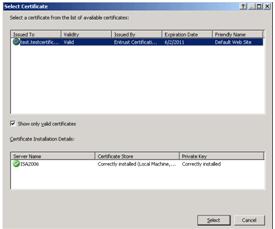
5. Click Select Certificates and highlight the new certificate. Click Select.
6. Click OK . Click Apply to save the changes.
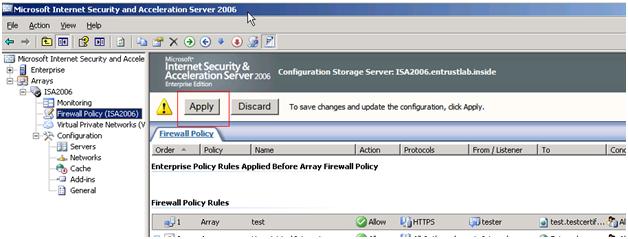
7. The ISA server may have to be restarted for the changes to be updated.
If you have any questions or concerns please contact the
Entrust Certificate Services Support
department for further assistance:
Hours of Operation:
Sunday 8:00 PM ET to Friday 8:00 PM ET
North America (toll free): 1-866-267-9297
Outside North America: 1-613-270-2680 (or see the list below)
NOTE:
It is very important that international callers dial the UITF format exactly as indicated. Do not dial an extra "1" before the "800" or your call will not be accepted as an UITF toll free call.
|
Country |
Number |
|
Australia |
0011 - 800-3687-7863
|
|
Austria |
00 - 800-3687-7863 |
|
Belgium |
00 - 800-3687-7863 |
|
Denmark |
00 - 800-3687-7863 |
|
Finland |
990 - 800-3687-7863 (Telecom Finland)
|
|
France |
00 - 800-3687-7863 |
|
Germany |
00 - 800-3687-7863 |
|
Hong Kong |
001 - 800-3687-7863 (Voice)
|
|
Ireland |
00 - 800-3687-7863 |
|
Israel |
014 - 800-3687-7863 |
|
Italy |
00 - 800-3687-7863 |
|
Japan |
001 - 800-3687-7863 (KDD)
|
|
Korea |
001 - 800-3687-7863 (Korea Telecom)
|
|
Malaysia |
00 - 800-3687-7863 |
|
Netherlands |
00 - 800-3687-7863 |
|
New Zealand |
00 - 800-3687-7863
|
|
Norway |
00 - 800-3687-7863 |
|
Singapore |
001 - 800-3687-7863 |
|
Spain |
00 - 800-3687-7863 |
|
Sweden |
00 - 800-3687-7863 (Telia)
|
|
Switzerland |
00 - 800-3687-7863 |
|
Taiwan |
00 - 800-3687-7863 |
|
United Kingdom |
00 - 800-3687-7863
|
